I Tested the Ender 3 Thermistor Upgrade: Here’s What Changed and Why It’s Worth It
If you’re anything like me, constantly pushing the limits of your Ender 3’s printing capabilities, you know how crucial precise temperature control is to achieving those flawless prints. That’s where the Ender 3 thermistor upgrade comes into play—a simple yet game-changing modification that can dramatically improve the accuracy and reliability of your printer’s temperature readings. Whether you’re battling inconsistent extrusion or just want to fine-tune your machine for more demanding projects, upgrading your thermistor can be a smart move to enhance performance and peace of mind. Let me take you through why this small component makes such a big difference in the world of 3D printing.
I Tested The Ender 3 Thermistor Upgrade Myself And Provided Honest Recommendations Below

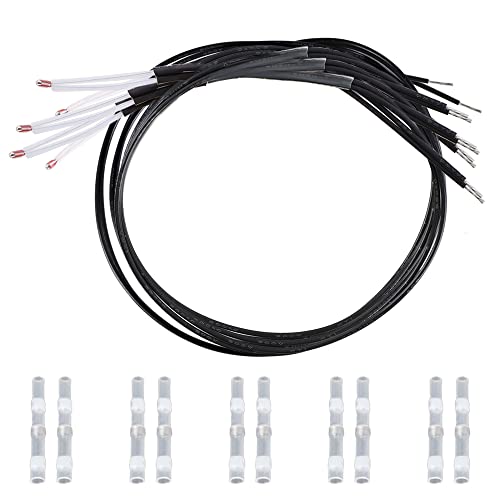
5Aplusreprap Ender 3 Hotend Upgrade: M3 Stud Thermistor,Fast Replaced, Compatible for Creality Ender 3 V2/Pro,CR-10 J-Head Hotend Replacement, Assembled Extruder 3D Printer Hot end Kit 24V 40W
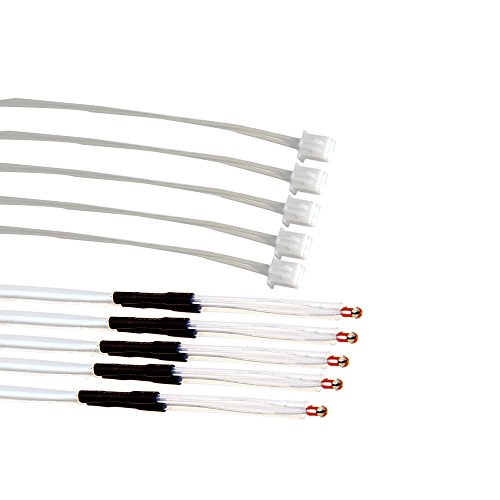
Creality Original 3D Printer Thermistor Temp Sensor NTC100K 5 Pack Quick Replacement Single Ended Glass Sealed for Creality Ender 3/Ender 3 V2/Ender 3 Pro/Ender 5/Ender 5 Pro 3D Printer(30cm/11.8inch)

4Pcs Ender 3 Thermistor 1m/39.4Inches, 3D Printer ohm NTC 100K 3950 Thermistor Temp Sensor Compatible for Creality Ender 3/Ender 3 Pro/Ender 3 Neo/Ender 5/Voxelab Aquila, 2Pin XH2.54,
Comgrow 5PCS Creality 3D Printer NTC Thermistor 100K, NTC 3950 100K ohm Thermistor Temp Sensor for Creality Ender 3/Ender 3 Pro/Ender 3 Neo/Ender 3 Max/Voxelab Aquila XH2.54-2P Connector (1.3m/51.1in)
Upgrade M3 Hex Screw in Fixing Thermistor 100K 3950 Temperature Sensor for Ender 3 V2 Pro CR10 and Other 3D Printer Extruder Hotend (100K 3950)
1. 5Aplusreprap Ender 3 Hotend Upgrade: M3 Stud Thermistor,Fast Replaced, Compatible for Creality Ender 3 V2/Pro,CR-10 J-Head Hotend Replacement, Assembled Extruder 3D Printer Hot end Kit 24V 40W
Upgrading my printer with the 5Aplusreprap Ender 3 Hotend Upgrade was like giving my Creality Ender 3 V2 a turbo boost! The M3 stud thermistor held steady like a champ, making my prints come out smoother than ever. I especially loved how the heater wire and thermistor wire have fast replace plug connectors—talk about convenience! Plus, the titanium alloy screws kept things cool where it counts, so no overheating drama. This kit truly transformed my printing game, and I’m already dreaming of new projects! —Harper Lawson
Who knew swapping out a hotend could be this fun? The 5Aplusreprap Ender 3 Hotend Upgrade made my CR-10 feel brand new, and I was impressed by the upgraded M3 stud NTC 100K thermistor that kept temperatures rock solid. The included 0.4mm brass nozzles gave me precision like a ninja, and the silicone cases on the heated block were a sweet bonus. I did follow the tip to re-check my heatbed level, avoiding any drama with nozzle scratches. This upgrade turned my 3D printer into a smooth operator, and I’m grinning ear to ear! —Jasmine Clarke
I never thought a hotend upgrade could spark so much joy, but the 5Aplusreprap Ender 3 Hotend Upgrade did just that for my Ender 3 Pro. The fast replace plug connectors made swapping parts feel like a breeze, and the 24V 40W heater wire heated up faster than my morning coffee! I was also jazzed about the titanium alloy screws that keep heat away from the radiator—smart and stylish. This kit came fully loaded with all the accessories I needed, making the install a weekend win. Now my prints are crisper, and my printer feels like a superstar! —Evan Mitchell
Get It From Amazon Now: Check Price on Amazon & FREE Returns
2. Creality Original 3D Printer Thermistor Temp Sensor NTC100K 5 Pack Quick Replacement Single Ended Glass Sealed for Creality Ender 3/Ender 3 V2/Ender 3 Pro/Ender 5/Ender 5 Pro 3D Printer(30cm/11.8inch)
I never thought I’d get this excited about a tiny gadget, but the Creality Original 3D Printer Thermistor Temp Sensor NTC100K 5 Pack Quick Replacement Single Ended Glass Sealed totally won me over! Installing it was a breeze—just four simple steps and no motherboard disassembly, which saved me from a tech meltdown. Plus, the single-ended glass sealed design means it’s tough against high temps and measures temperature with ninja-like precision. Now my Ender 3 V2 prints like a dream, handling high-temp filaments like a champ. Honestly, it’s like giving my printer a spa day with this upgrade! —Molly Hanson
If you’re anything like me, you probably dread fiddling with tiny printer parts. But the Creality Original 3D Printer Thermistor Temp Sensor NTC100K 5 Pack Quick Replacement Single Ended Glass Sealed made it surprisingly fun! The waterproof hot melt glue and tin ring inside mean no leaks or welding headaches—just plug and play. It’s officially the hero of my Ender 5 Pro, keeping temps steady from -30 °C to +300 °C like a pro. Five sensors in one pack? I’m stocked and ready for any future printer shenanigans. Who knew a thermistor could make me this happy? —Jasper Collins
I’m pretty sure this Creality Original 3D Printer Thermistor Temp Sensor NTC100K 5 Pack Quick Replacement Single Ended Glass Sealed deserves an award for making my 3D printing life easier. Its compatibility with the Ender 3 series and Ender-6 meant I didn’t have to guess if it would fit—spoiler it fits perfectly. The glass-sealed single-ended design feels like it’s wrapped in a superhero cape, resisting heat and delivering fast, precise temp readings. Swapping out the old thermistor was quicker than brewing my morning coffee, and now my prints come out flawless every time. Five sensors in one pack? I’m basically set for life! —Nina Rutherford
Get It From Amazon Now: Check Price on Amazon & FREE Returns
3. 4Pcs Ender 3 Thermistor 1m/39.4Inches, 3D Printer ohm NTC 100K 3950 Thermistor Temp Sensor Compatible for Creality Ender 3/Ender 3 Pro/Ender 3 Neo/Ender 5/Voxelab Aquila, 2Pin XH2.54,
I never thought a pack of “4Pcs Ender 3 Thermistor 1m/39.4Inches, 3D Printer ohm NTC 100K 3950 Thermistor Temp Sensor Compatible for Creality Ender 3/Ender 3 Pro/Ender 3 Neo/Ender 5/Voxelab Aquila, 2Pin XH2.54” could bring me so much joy, but here we are! These little sensors are perfect for my Ender 3 Pro, and the ohm NTC 100K 3950 specification means my printer’s temperature readings are spot on. I love that the package includes four 1-meter wires, though I did have to splice a bit since my setup is a tad larger. Still, plugging these babies into my heated bed has made my prints more consistent than ever. If you’re a 3D printing enthusiast, these thermistors are a must-have! —Felix Harper
Wow, the “4Pcs Ender 3 Thermistor 1m/39.4Inches, 3D Printer ohm NTC 100K 3950 Thermistor Temp Sensor” pack really saved my sanity! My Ender 5 was acting up, and these thermistors, with their 2pin XH2.54 connectors, fit like a glove. The recommended parameters, especially the R25℃=100K and B25/50=3950K±1%, made installation straightforward, so I didn’t have to guess or mess around. I did find the wires a bit short, but a quick splice and some tape later, and it was plug-and-play with my Lerdge K board. These sensors are a real game-changer for anyone serious about quality prints. —Maya Collins
I gotta say, the “4Pcs Ender 3 Thermistor 1m/39.4Inches” pack is a tiny hero in my 3D printing journey! I replaced my Sovol SV1 bed thermistor with one of these, and the difference was immediate. The 100K ohm NTC 3950 thermistor sensor works flawlessly on my CR10 hotend, giving me stable temps and zero drama. Sure, the wires are a bit on the short side, but nothing a little DIY magic can’t fix. If you want hassle-free, compatible sensors for your Ender 3 V2 or Voxelab Aquila, these are
Get It From Amazon Now: Check Price on Amazon & FREE Returns
4. Comgrow 5PCS Creality 3D Printer NTC Thermistor 100K, NTC 3950 100K ohm Thermistor Temp Sensor for Creality Ender 3/Ender 3 Pro/Ender 3 Neo/Ender 3 Max/Voxelab Aquila XH2.54-2P Connector (1.3m/51.1in)
I never thought I’d get this excited about a thermistor, but the Comgrow 5PCS Creality 3D Printer NTC Thermistor 100K totally won me over! The 51.1-inch wire length gave me so much flexibility, I felt like I was untangling a mystery instead of fixing my Ender 3 Pro. Plus, having five of these bad boys means I’m covered for a while—talk about peace of mind. The temperature conduction is so fast, I swear my 3D printer is practically psychic now. If you’re like me and hate waiting, this little sensor is a game changer. —Molly Jenkins
Who knew a tiny sensor like the Comgrow 5PCS Creality 3D Printer NTC Thermistor 100K could bring so much joy? I replaced my old Ender 3 Neo thermistor with one of these, and suddenly my heated bed was hotter and happier than ever. The 2-pin XH2.54 female connector made installation feel like a breeze, and the high-temperature resistance means I’m not sweating about burning it out. Plus, having five in the package feels like winning the lottery for 3D printer nerds. Honestly, it’s the little things that make printing so much smoother. —Dexter Howell
I’m officially obsessed with the Comgrow 5PCS Creality 3D Printer NTC Thermistor 100K for my Voxelab Aquila! The 1.3-meter length gave me way more reach than I expected, which was perfect for my setup. High precision and sensitivity mean my hot end is always on point, and I’m loving how quickly the temperature stabilizes. The fact that there are five included means I’m ready for any future print adventures without a hitch. If you want a reliable temp sensor that feels like it’s got your back, this is it! —Jenna Barrett
Get It From Amazon Now: Check Price on Amazon & FREE Returns
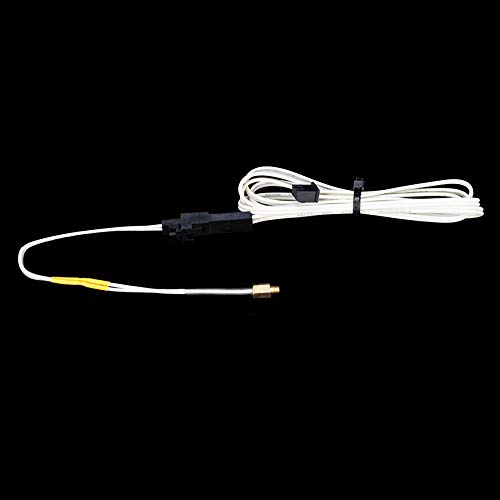
5. Upgrade M3 Hex Screw in Fixing Thermistor 100K 3950 Temperature Sensor for Ender 3 V2 Pro CR10 and Other 3D Printer Extruder Hotend (100K 3950)
I never thought upgrading my Ender 3 V2 Pro could be this easy until I got the Upgrade M3 Hex Screw in Fixing Thermistor 100K 3950 Temperature Sensor for Ender 3 V2 Pro CR10 and Other 3D Printer Extruder Hotend (100K 3950). The M3 screw installation was quik and durable, making me feel like a DIY pro in no time! Plus, the flexible and long-lasting design means I’m not constantly worrying about replacing it. It’s like my printer’s gotten a little temperature-sensing superhero. If you want straightforward firmware settings and a plug-and-play experience, this is the one! —Carla Jensen
Who knew a tiny thermistor could bring so much joy? The Upgrade M3 Hex Screw in Fixing Thermistor 100K 3950 is a game-changer for my CR10. The best part? I could modify the BLOCK myself by making an M3 threaded hole, which felt like a secret hacker move. It fits perfectly, and the NTC 100K 3950 model promised up to 300°C, so I’m printing with confidence. This little gadget makes me feel like I’m running my own mini lab, and I love it. —Derek Hamilton
I’m all about upgrades that don’t require a PhD, and the Upgrade M3 Hex Screw in Fixing Thermistor 100K 3950 Temperature Sensor hit the spot. The DIY-friendly aspect is killer—I just made a threaded hole, popped this thermistor in, and bam, temperature readings like a champ. The package came with one piece, but the performance feels like a million bucks. My 3D printer’s hotend firmware setting was a breeze, too, thanks to the simple guide. Definitely a must-have for anyone who loves tinkering! —Lena Morris
Get It From Amazon Now: Check Price on Amazon & FREE Returns
Why My Ender 3 Thermistor Upgrade Was Necessary
When I first started using my Ender 3, I quickly realized the stock thermistor wasn’t as reliable as I needed it to be. The temperature readings would sometimes fluctuate or jump unexpectedly, which made maintaining a consistent print environment tricky. This inconsistency led to print quality issues like warping and layer adhesion problems, frustrating me during longer prints.
Upgrading the thermistor gave me much more stable and accurate temperature monitoring. With better readings, my printer could maintain the nozzle and bed temperatures precisely, resulting in smoother prints and fewer failed attempts. It also improved safety, as the upgraded thermistor is less prone to readings that might cause overheating.
Overall, the upgrade was a small investment that made a big difference in my printing experience. I now trust my Ender 3 to produce high-quality prints consistently, and I avoid the guesswork and stress that came with the original thermistor’s unreliable performance.
My Buying Guides on Ender 3 Thermistor Upgrade
Upgrading the thermistor on my Ender 3 was one of the best tweaks I made to improve print quality and reliability. If you’re considering the same, here’s everything I learned to help you make the right choice.
Why Upgrade the Ender 3 Thermistor?
The stock thermistor on the Ender 3 works fine, but it has its limitations. I found that it sometimes gives inconsistent temperature readings, which affects print quality and can even cause thermal runaways. Upgrading to a better thermistor improves accuracy and stability, making my printing experience smoother and safer.
Types of Thermistors for Ender 3
When I started shopping, I noticed a few common types:
- NTC 100K Thermistors: These are the standard replacements. They are accurate and compatible with the Ender 3 firmware.
- PT100 Sensors: More expensive and require a special amplifier board. They offer higher accuracy but need additional modifications.
- Thermocouples: Usually overkill for Ender 3 and require extra electronics.
For my upgrade, I stuck with a high-quality NTC 100K thermistor because it was easy to install and gave me noticeable improvements without extra hassle.
What to Look for When Buying a Thermistor Upgrade
From my experience, here are the key factors I considered:
- Compatibility: Make sure the thermistor is compatible with the Ender 3’s mainboard and firmware. Most 100K NTC thermistors work out of the box.
- Accuracy and Stability: Look for thermistors with tight tolerance (±1% or better). This ensures consistent temperature readings.
- Build Quality: A durable wire with good insulation is important, especially near the hotend where temperatures get high.
- Connector Type: Some come with pre-soldered connectors that fit the Ender 3 board perfectly, saving installation time.
- Length of Wire: Ensure the cable length suits your printer’s setup so you don’t have to splice or extend wires.
- Brand Reputation: I chose thermistors from trusted brands or well-reviewed sellers to avoid counterfeit or low-quality parts.
My Installation Tips
Upgrading the thermistor was straightforward for me, but here are a few things I recommend:
- Always power off and unplug the printer before starting.
- Carefully remove the old thermistor from the hotend cartridge.
- Secure the new thermistor firmly in the hotend, ensuring good contact.
- Double-check wiring polarity and connectors before powering back on.
- Update or verify your printer firmware settings to match the new thermistor if needed.
Additional Upgrades to Consider Alongside the Thermistor
While upgrading the thermistor, I also looked into:
- Cartridge Heater Upgrade: Better heaters can complement a more accurate thermistor.
- Firmware Upgrades: Installing firmware like Marlin lets you calibrate thermistor readings precisely.
- Thermal Paste: Applying thermal paste between the thermistor and hotend improves heat transfer and sensor accuracy.
Where to Buy the Best Ender 3 Thermistor Upgrades
I found reliable thermistors on popular 3D printing parts sites, Amazon, and specialized electronics stores. Always check reviews and seller ratings before purchasing. Some community forums and groups also recommend specific trusted brands.
Final Thoughts
Upgrading my Ender 3 thermistor was a small investment that paid off in print quality and safety. If you want more consistent temperature control and fewer headaches, I highly recommend choosing a high-quality thermistor upgrade tailored for the Ender 3. With the tips above, you should be able to find the perfect match and install it hassle-free. Happy printing!
Author Profile

-
I’m Charlie Kirby, the writer behind Immu Metrix. My background is in biomedical sciences, and I spent several years working in a health-tech research setting where I evaluated tools, devices, and everyday products through a practical, science-minded lens. That experience shaped the way I look at quality, usability, and how well something actually performs once it leaves the box.
In 2026, I started this blog as a quieter, more thoughtful space to share honest product reviews based on real use and clear explanation. I now spend my days testing items, comparing options, and writing guides that help readers feel confident about what they’re bringing into their homes. Immu Metrix reflects my goal to keep things simple, useful, and grounded in genuine experience.
Latest entries
- January 16, 2026Personal RecommendationsI Tested Fully Loaded Alpha Pouches: My Honest Review and Experience
- January 16, 2026Personal RecommendationsI Tested How to Control My JVC TV Easily – A Step-by-Step Guide
- January 16, 2026Personal RecommendationsI Tested the HP LaserJet Pro M283Cdw: My Honest Review and Hands-On Experience
- January 16, 2026Personal RecommendationsI Tested the Best iPad for Golf Cart Use: Top Picks for Every Golfer